One of the great advantages of Google Keep is its checklist functionality. You can use checklists for creating to-do lists; packing lists; and shopping lists, to name just a few. I personally have created a default packing list which I then copy and edit as required for every new trip.
Creating a checklist note on the web
- Open https://keep.google.com.
- Click on the checklist icon in the “Take a note…” box and an empty note will appear with list items all ready to go.

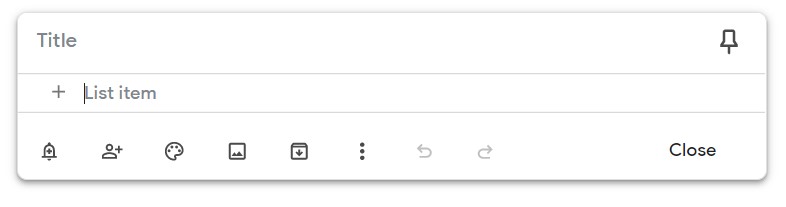
- You can enter a title for the list or simply just start entering your list items.
- To create new list items tap on the Enter key or tap in the “List Item” text box.
- Once you’ve finished creating your note click Close to save and close the note.
Creating indented list items on the web
Google Keep offers two levels to a checklist which is handy if you want to create multiple items under one list item – for example all the items you need to purchase at one store can be listed under item 1, whilst all the items you need to purchase at another store can be listed under item 2.
- Open https://keep.google.com
- Click on the note you wish to edit
- Type the list item you wish to indent, just as normal.
- Hover over the left hand side of the list item and click and hold on the Grid icon (2 x 3 grid of dots).
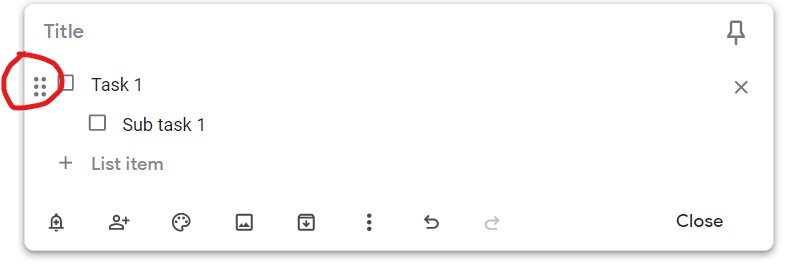
- Drag the item to the right to create an indented list item or drag it to the left to remove the indent.
- Once you’ve finished creating your note click Close to save and close the note.
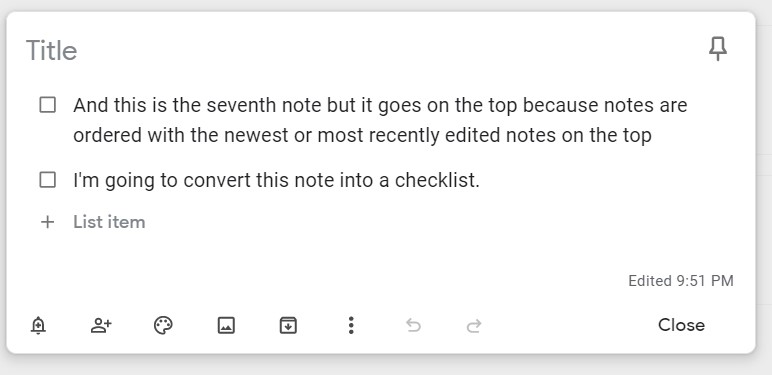
Editing a checklist note on the web
- Open https://keep.google.com
- Click on the note you wish to edit
- To delete a list item, click the Delete icon on the right hand side.
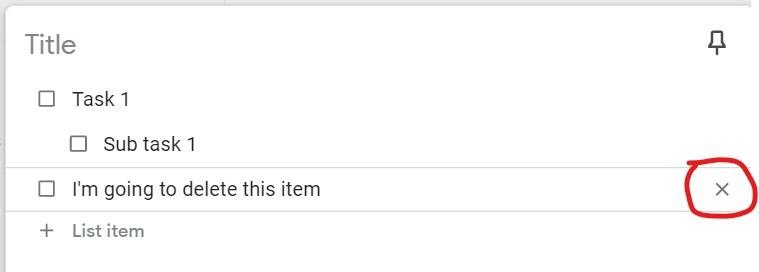
- To move items up and down the list, hover over the left hand side of the list item and click and hold on the Grid icon (2 x 3 grid of dots).
- Drag the item to its new place in the list.
- Once you’ve finished creating your note click Close to save and close the note.
Converting to a list style note on the web
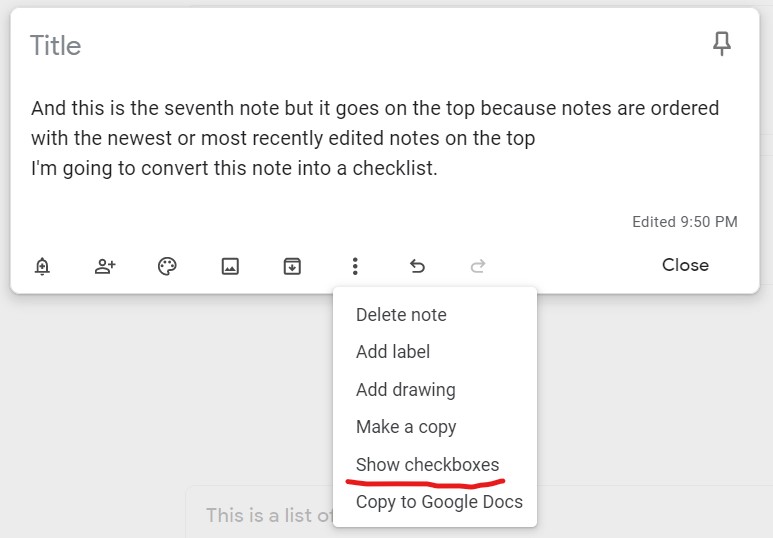
If you’d like to convert a basic text note into a checklist style note
- Open https://keep.google.com.
- Click on the note you wish to change.
- Click on the More menu icon in the bottom right of the note.
- Click on Show tick boxes (or show checkboxes depending on your language settings).
Don’t like the changes or you’d like to change a list style note to a plain text note?
- Open https://keep.google.com.
- Click on the note you wish to change.
- Click on the More menu icon in the bottom right of the note.
- Click on Hide tick boxes.
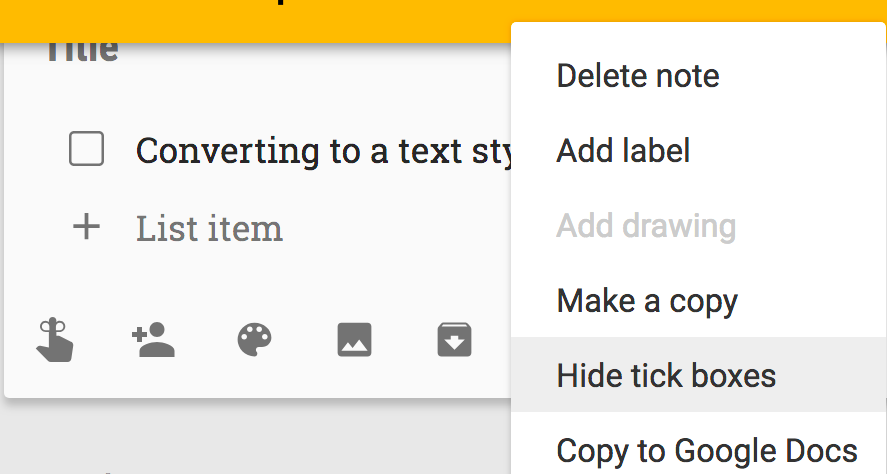
The note will now look like a regular text note again.
Creating a checklist note via the mobile app:
- Open the Keep application.
- Tap the checklist icon
in the “Take a note…” box and an empty note will appear with list items all ready to go.
- You can enter a title for the list or just enter your list items.
- To create new list items tap on the Enter key or tap on the “List Item” text.
Creating indented list items on the mobile app
- Open the Keep application.
- Tap on the note you wish to edit.
- Tap and hold on the Grid icon
on the left hand side of the list item.
- Drag the item to the left or right to create an indented list item.
Editing a checklist note on the mobile app
- Open the Keep application.
- Tap on the note you wish to edit
- To delete an item, tap the Delete icon
on the right hand side of the list item.
- To move items up and down the list, tap and hold on the Grid icon
- Drag the item to its new place in the list.
- Once you’ve finished creating your note tap the Back Arrow to save and close the note.
Converting to a list style note on the mobile app
If you’d like to convert a basic text note into a checklist style note
- Open the Keep application.
- Tap on the note you wish to change.
- Tap on the Add icon
in the bottom left of the note.
- Tap on Tick boxes. (For iOS tap on Show tick boxes).
Don’t like the changes or you’d like to change a list style note to a plain text note?
- Open the Keep application.
- Tap on the note you wish to change.
- Tap on the More menu icon in the top right of the note.
- Tap on Hide checkboxes. (For iOS users tap on Hide tick boxes).
The note will now look like a regular text note again.
Looking for help with a specific issue?
I can help with a number of common Google Workspace issues, such as regaining administrator access; fixing email delivery issues; and cybersecurity.
Leave a Reply