So last week I wrote about how to add email aliases to Google Workspace and noted that this works well if you’ve got one user who wants multiple email identities.
But, if you’ve got many users who all want to use the same email address, what do you do? Well firstly you DO NOT create an email address and then give them all the password so they can log in – this is all kinds of bad, please do not do it.
What you can do instead is create a group inbox (or as Google calls it a collaborative inbox) and give users access to that. So without any further ado let’s go ahead and see how that’s done.
Step 1: Create a Group
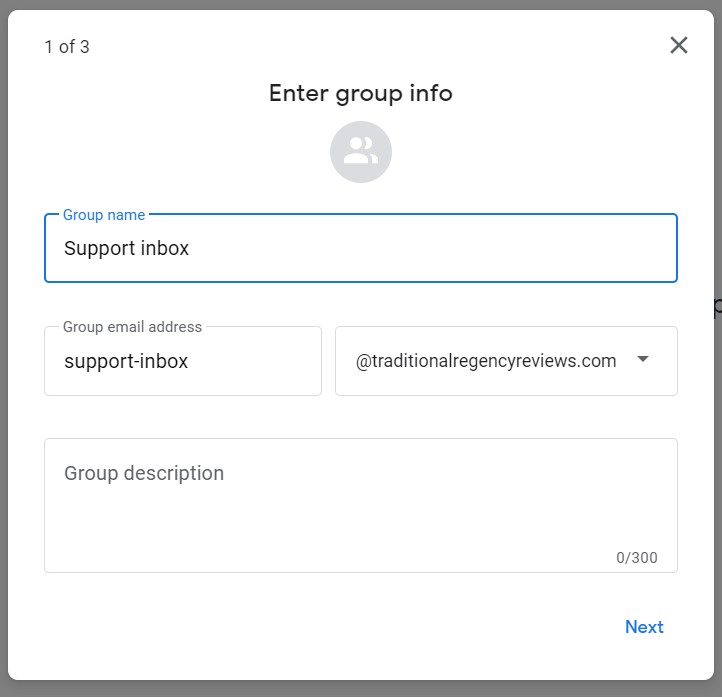
- Sign in to Google Groups on your computer.
- In the upper-left corner, click Create group and then enter the Group name. By default the group name will be entered as the email address but you can change this if you want. Enter a group description if you want, but it isn’t mandatory.
- Click on Next.
- Now choose the privacy settings. By default a group’s privacy settings are wide-open: anyone in the organisation can join; view conversations; post in the group and view members. To change any of the privacy settings click on the little person outline in the relevant area. For me, I tend to make it a little more locked down like in this image:
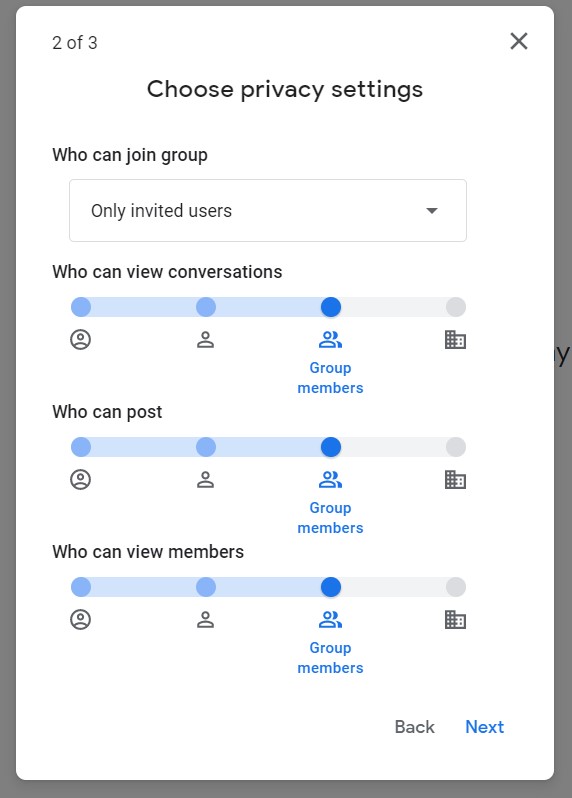
- Click on Next
- You can now choose to add members to the group and write a welcome message or just click on Create group. For me personally I will write the welcome message but not necessarily add members just yet. The welcome message is sent to new members as they are added so it is good practice to have one in place before adding members.
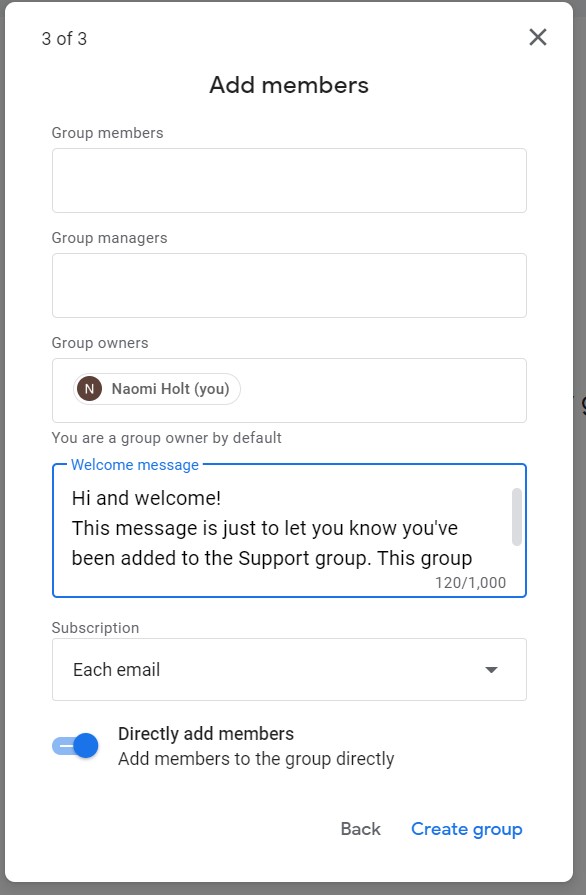
- Click on Create Group / Go to group
- Click on Group settings in the left hand side menu
- Scroll down the page and click on Collaborative inbox.
- Then scroll a bit further down the page and make sure you’ve set group members under ‘Who can moderate content’ and ‘Who can moderate metatdata’.
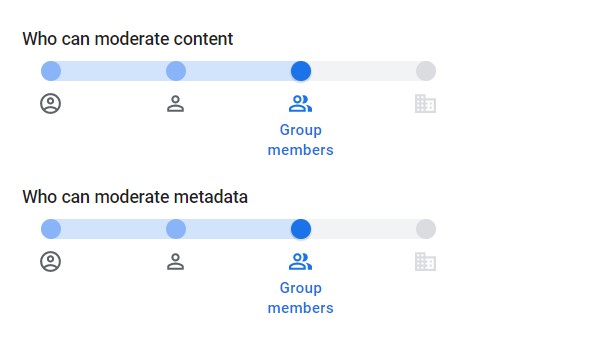
- Click on Save changes
Using the new group as a group / collaborative inbox inside your business
Once the group has been created, it is possible for anyone to email that group just by using the email address that you’ve created.
By default, all emails that are sent to that group will appear in the members’ own personal inboxes. They can reply to the emails just as normal, but only with their own email addresses. To reply to an email using the group inbox email address:
- On your computer, open Gmail.
- In the top right, click Settings
See all Settings.
- Click the Accounts and Import or Accounts tab.
- In the “Send mail as” section, click Add another email address.
- Enter the full email address of the group inbox.
- Click Next Step and follow the confirmation steps.
In future when you want to send a message through the group inbox in Gmail, click the down arrow next to From to select the correct address.
I highly recommend using this method if your group inbox is comprised solely of people within your business. You can send emails, send calendar invitations, and share documents with your entire team all through this method.
Using the inbox with people outside your business
But if you want to use the group more like a central support inbox for example then you need to make some changes to the group settings and set up a different way of handling emails.
To allow external people to email the group inbox
- Log into your Google Workspace Admin console and go to Apps / Google Workspace / Groups for Business / Sharing settings
- Click on Group owners can allow incoming email from outside the organisation
- Click Save.
- If you did this after creating your group, you’ll need to go back to Google groups and click on the group you just created.
- then click on Group settings and scroll down the page.
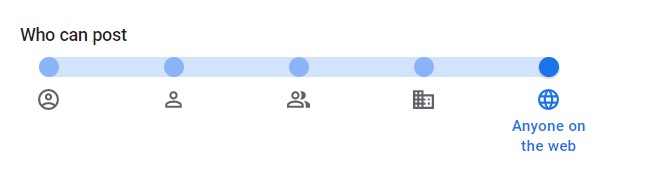
- change ‘Who can post’ to anyone on the web and click Save changes
A different way of answering emails
By default, all emails to the group inbox will be sent to individual members who can then respond directly from Gmail. However, those sent emails are not recorded in the overall group so there’s no way for other members to know if an email has been answered or not.
If it’s important for all other members to know what’s been sent as well as what’s been received, then messages need to be answered in the group itself:
- Click on the message and then click on the Reply arrows. If you haven’t previously added the group’s email address to your personal Gmail settings then you’ll only be able to respond with your primary email address.
You should also amend your own personal collaborative group settings so that you don’t receive emails that are sent to the group, in your personal Gmail inbox. Otherwise the temptation will always be to respond directly from Gmail:
- Go to Google Groups and click on the collaborative group that you need to change.
- Click on My membership settings and under ‘Subscription’ select No email.
- Deselect Subscribe me to email updates when I post to a conversation and click on Save Changes.
Other things you can do in a collaborative group / inbox
There are additional steps that can be taken within a collaborative group / inbox regardless of whether it is purely internal or external people can also post to it. You can:
- Assign a conversation to yourself or others. You can assign responsibility for a conversation to yourself or another group member. You can also search conversations based on their assignment status.
- Resolve a conversation. To resolve a conversation, you can mark it as complete, needing no further action, or a duplicate of another conversation. In the conversation list, a resolved conversation displays the appropriate status (complete, no action needed, or duplicate) to the right of the subject.
- Remove resolved conversations from the list. You can delete conversations you resolved. If you do, they disappear permanently and you can’t restore them. Instead of deleting them, you can filter the conversation list to show only conversations in an unresolved (active) state.
- Use labels to categorise conversations. You can organise your collaborative inbox by applying labels to related conversations. Labels let you categorize conversations across assignment and resolution status.
- Sign in to Google Groups.
- Click the name of a group.
- On the left, click Group settings.
- Scroll down the page and under Shared labels, check the Enable shared labels for this group box.
- Click on Save changes.

Hi, I’m Priya! I’m a certified Google Workspace Administrator and Product Expert who speaks ‘human’, not I.T.
I help small business owners stop wrestling with their Google Workspace and start using it to grow.
Leave a Reply